
How to make an app: A step-by-step tutorials
The world of mobile app development is ever-changing. With the constant advancement of technology and the increasing demand for apps, there is a greater need for different methods of app development, fueling interest in how to make an app. This has led to a need for online businesses to adapt and create mobile apps. Creating a mobile app is a great way for businesses to engage with customers and increase their revenue.
Mobile apps are a vital part of today’s on-the-go lifestyle. Nearly 4.7 billion people worldwide use smartphones, spending an average of 3 hours and 45 minutes daily online through apps. This large user base and high engagement make the app market attractive and highly competitive. As of 2024, there were over 2.3 million apps on Google Play and 1.9 million on Apple’s App Store, with popular categories including games (accounting for about 12% of all apps) and business and education.
The app economy is significant, with global in-app advertising revenue reaching $315 billion in 2023 and users spending $85.1 billion on Apple’s App Store that same year (compared to $47 billion on Google Play).
With so much activity in the app development world, starting with thorough market research and a clear strategy is essential when creating a new app. This guide will walk you through each step, from researching the market and refining your idea to choosing the best development method (native, web, hybrid, or even AI-assisted) and selecting features. We’ll also discuss testing, publishing, and best practices for post-launch success. Additionally, we’ll compare leading no-code app builders, including AppsGeyser, and answer common questions beginners have about creating their apps.
Market Research
Before you spend time and money developing an app, study the market:
- Smartphone and app usage trends. In the last decade, smartphone adoption has increased dramatically, from approximately 1 billion users in 2014 to nearly 4.7 billion today. People use their phones extensively, spending about 3 hours and 45 minutes online daily. This presents a significant potential audience, but it also means fierce competition. It’s important to research where your potential users are, as Android dominates the global market, while iOS has a strong presence in specific markets.
- Number of apps and downloads. As of 2024, Google Play and the Apple App Store host over 4 million apps. Millions of new apps are released yearly (an average of 1,200 per day). Knowing this, ask if your app will stand out. Check downloads in your niche and trends (e.g., via industry reports or tools like Data ai).
- Top categories and user preferences. Games are consistently the largest category of apps, accounting for approximately 12% of all downloads. Other popular categories include business, education, health and fitness, lifestyle, and shopping. If your app idea overlaps with any of these areas, you can find inspiration by looking at leading apps in those categories for feature ideas. You can also use Statista and industry blogs to see charts of top categories and usage metrics, such as those provided by eMarketer and Sensor Tower.
- Monetization landscape. Determine how apps in your category make money. For instance, mobile games often rely on in-app purchases and advertisements, while productivity apps may charge a subscription fee. Note that the worldwide in-app advertising market is worth hundreds of billions of dollars and continues to grow, reflecting the potential for advertising-supported models.
- Competitor analysis. Identify direct and indirect competitors, download and use their apps, and read user reviews to understand what people like and dislike. Tools such as SimilarWeb and App Radar can help estimate competitors’ download numbers and revenue, which can help you refine your unique value proposition.
- Target audience and platform. Define who will use your app and on which devices. For example, enterprise apps may target professionals (often using iOS), while a local service app may focus on Android users in specific regions. Designing with your target audience’s preferences in mind (UI style, language, features) will increase your chances of success.
In summary, gather data and insights about how many people use relevant apps, what features they want to see, and how these apps perform. If needed, use surveys or landing pages to validate this information. By understanding the market, you can ensure that your app idea is feasible and tailored to users’ actual needs.
How to Come Up with a Great App Idea
A successful app idea solves a real-world problem or improves an existing process. To further develop your concept:
- Brainstorming can help solve a real problem or need. Ask yourself: What problem am I facing? What do others complain about? The best solutions address a specific need or gap. For example, if people have difficulty finding local services, an app that provides a curated list of local businesses could be useful.
- Leverage your expertise or hobby. Many successful applications are created by individuals and businesses who deeply understand a particular field. If you have an online store, consider creating an app to boost sales. If you own a gym, an app could help manage bookings and send notifications. You don’t need to invent something completely new—even bringing an existing business online through an app can be beneficial.
- Research and differentiate. Check to see if similar apps already exist. If so, study them by reading their reviews and features. Ensure your app stands out with a clear differentiator, such as better UX, a niche focus, or added features. Your app should ensure that it solves a problem and has unique points compared to competitors.
- Define your goals and target audience. Clearly state what your app aims to achieve. Who is your target user? What value will they gain from using your app? By writing down your app’s goals and asking questions, you can focus on the essential features first, which is often referred to as defining the Minimum Viable Product (MVP).
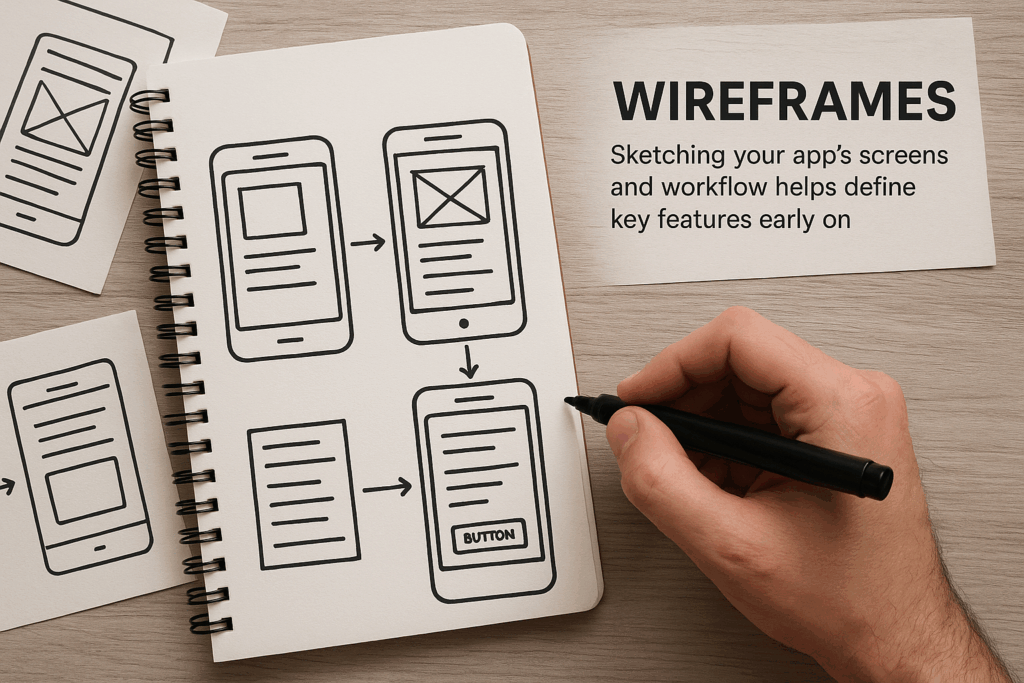
- Sketch and prototype. Even during the idea stage, sketch the main screens or user flow using pen and paper or tools like Balsamiq or Figma. Early prototyping allows you to experiment with the layout and flow of your app. Focus on the essential parts of your interface before starting to work on design elements. It’s much easier to adjust a sketch than to rework a fully built app.
- Validate with users. Share your app idea with potential users or stakeholders to get their feedback. Ask them if they find the idea useful and if they would be willing to pay for it. Even a simple survey or landing page can help gauge your idea’s interest.
By the end of this phase, you should have a well-defined app concept, a clear target audience, and a list of essential features. Avoid getting bogged down in unvalidated ideas—a simpler, thoroughly researched app idea is always better than a complicated, untested one.
Different App Development Methods
There are several ways to create an app. The best approach depends on your budget, skills, timeframe, and your app’s specific needs. Common approaches include:
- Native Development. This means writing code that is specific to a particular platform. Android developers use Java or Kotlin with Android Studio. IOS uses Swift or Objective-C with Xcode. Native apps can access all the device’s features (camera, GPS, sensors, and more) and provide the best performance. However, developing natively is the most time-consuming and expensive option, requiring building two separate apps for each platform. You only need to make this choice if you create a native app from the ground up. It’s like building two apps separately. Use native development if you require heavy graphics (for example, games) or specific platform features.
- Cross-Platform/Hybrid Apps. These methods allow you to create code once and deploy it on Android and iOS platforms. The technologies include Flutter (based on Dart), React Native (based on JavaScript), Xamarin (based on C#), Cordova/Ionic (based on HTML/JavaScript), or Progressive Web Apps (PWAs) (using standard web technologies).
Flutter and React Native generate native code, which ensures high performance. Web-based hybrids, on the other hand, wrap a web app in a native “shell.” Hybrid apps can save time and money during development, as they share much code. However, they may have some performance or UI differences, and complex features, such as custom animations or background processing, may require native modules.
- Web Apps / Progressive Web Apps (PWAs). A web app is a website that has been optimized for mobile devices and can be accessed through a browser. A PWA (Progressive Web App) is a web app that acts like a native app. It can run offline using cached data, send push notifications, and be “installed” on the home screen without going through the App Store.
PWAs are easier to develop than native apps, as web developers can use familiar technologies like HTML, CSS, and JavaScript. They also eliminate the need for app store submission, making them a more cost-effective option. However, there are some limitations to PWAs. They have limited access to hardware features like Bluetooth and advanced camera features and don’t distribute through the iOS App Store. A PWA may be a good choice if your app’s functionality is primarily centered around browsing content or simple tools.
- No-Code and Low-Code App Builders. For entrepreneurs without technical skills, no-code platforms allow the creation of apps through drag-and-drop interfaces and pre-designed templates. These app builders will often enable you to customize the design, add features such as maps, chat, and login, and then publish your app to stores without coding. They significantly reduce development time and costs, allowing anyone to create their app without coding. No-code tools, such as Android and iOS, usually support cross-platform output. They are suitable for simple to moderately complex applications like business directories, event apps, and store apps. However, drawbacks exist, such as fewer customization options and the potential for platform lock-in.
- AI-Assisted App Development. Recently, there have been advancements in tools that utilize artificial intelligence (AI) to speed up app development. For example, new features on app development platforms use AI to generate code templates or user interfaces from descriptions. AI can also aid in accelerating the development process by creating standard code and designing user interfaces based on text inputs. Furthermore, AI can even test an app to ensure its proper functioning.
While AI cannot yet create a native app from a few sentences, it is a tool to aid developers. AI can save time on design and development by making UI elements as needed and automating repetitive tasks. However, it does not eliminate the need for skilled developers. In practice, developers utilize AI tools like GitHub Copilot and ChatGPT to compose code snippets and resolve issues.
In summary, choose native or hybrid coding if you need complete control and performance. Choose no-code and AI-assisted tools if you want speed and ease. Each method has trade-offs in speed, cost, flexibility, and performance.
How to Choose Features for Your App
Selecting the right features is crucial for building a valuable and engaging app. It’s essential to focus on what your users truly need and expect. Here are some guidelines and common feature categories to consider:
- Core Functionality First. Start with the features that solve your main problem. For example, if you’re building a delivery app, the core features include search, order processing, and GPS tracking. Remove any extras until you have a clear Minimum Viable Product (MVP).
- User Accounts & Personalization. Many apps benefit from users logging in or registering (using email, social media, etc.) to personalize content. Profiles allow users to save settings and preferences.
- Navigation & Search. An intuitive navigation system, such as tabs, menus, and gestures, is essential. If your app contains content or lists (products, articles, or events), provide a search function and filtering options to help users quickly find what they want.
- Push Notifications. Push notifications (for iOS and Android devices) can help re-engage users by delivering reminders, news, and offers. Use these notifications judiciously to improve user retention, but avoid spamming your users with too many notifications.
- Offline Access. Depending on your app’s purpose, consider offline mode. Caching content, such as saved articles and catalogs, can ensure basic functionality even without an internet connection.
- Location Services. Apps like maps, delivery, travel, and social networking often use GPS to determine location. Implement map views, distance calculations, or location-based recommendations if the location is relevant.
- Social and Sharing. If community engagement is a priority, integrate social features such as sharing to Facebook, Twitter, and Instagram, as well as friend lists and comments.
- Media and Content. Will your app need to support displaying images, audio, or video content? If so, ensure your app has robust uploading, streaming, and playing media features. For example, consider implementing video players, audio players, or image galleries.
- Payments and E-commerce. If you plan to sell products or services, consider integrating a shopping cart and a payment gateway, such as Stripe or PayPal. In-app purchases and subscriptions are popular monetization methods after launch.
- Security and Privacy. Strong security measures such as encryption and secure login are essential if your app deals with personal data or sensitive information. A privacy policy should also be included to ensure that users know how their data is being handled.
- Analytics and Feedback. Integrate tools such as Firebase Analytics or other SDKs to track user behavior and provide a feedback/reporting feature where users can report any issues or bugs they encounter.
- Frequently Asked Questions and Tutorials. For more complex apps, consider including help screens, tooltips, or a short tutorial to assist users.
Choose features that align with your app’s goals and user needs. Ask yourself, “Which features would be most desirable and help keep users engaged?” For each potential feature, consider whether it adds real value, complicates the app, and whether users would use it frequently. As you plan, consider how the screens will flow with these features in mind. Prototyping tools and wireframes can be helpful in this process.
Android vs. iOS Development
When developing mobile devices, deciding which platforms to target is important: Android, iOS, or both. Each platform has its advantages and disadvantages:
- Market Share and Audience. Android has a larger market share (over 70%) and more app installations globally. Apple’s iOS users are concentrated in North America and Western Europe. Considering your target audience: if your goal is a global reach or targeting developing markets, Android may be the primary platform; for a more niche or premium audience, iOS could be crucial.
- App Store Differences. Google Play (Android) and the Apple App Store have different policies. Google’s developer registration requires a one-time fee of $25, while Apple’s is $99 annually. Apple has strict guidelines and a review process, requiring you to provide app metadata such as the name, description, screenshots, and keywords and meet quality standards. In contrast, Google’s policies are more flexible, allowing apps to be published more quickly, although both stores review new submissions.
- Development Tools and Languages. Android apps are typically developed using Java or Kotlin with the Android Studio development environment. iOS apps, on the other hand, are written in Swift or Objective-C using Xcode. If you want to create apps for both platforms, you must write separate codebases for each platform. However, using cross-platform development tools can help reduce the amount of duplicate effort involved.
- Design Guidelines. Each platform has its own design conventions, such as Material Design for Android and Human Interface Guidelines for iOS. When developing apps, it’s important to remember that users expect them to “feel native.” This means that the user interface should be adapted to the platform it’s running on. For example, the back button in Android should be implemented differently than in iOS, and swipe gestures should be used instead of buttons for navigation on iOS.
- Monetization Trends. Note that iOS users, on average, spend more on apps. If in-app purchases are a significant source of revenue, iOS often outperforms Android. However, Android’s large user base means higher install counts and greater ad revenue in certain niches.
- Testing and Fragmentation. Android devices come in various sizes, operating system versions, and manufacturers, so it’s important to thoroughly test on as many devices as possible. While iOS has fewer device types, it still requires testing on older models of iPhones and iPads.
In practice, many startups prefer to launch their products on one platform at first (often the platform where their users are already active) and then expand later. If you use a no-code or cross-platform development tool, you can deploy your app to both stores simultaneously, saving time and effort. The most important thing is to tailor your product to the specific needs of your target audience and to follow each store’s guidelines and technical specifications.
App Development with AI + No-Code App Builders
App Development with AI and No-Code Builders
In recent years, the use of AI-powered tools and no-code app builders has risen, making it easier for non-programmers to create apps.
While no-code tools are great for quickly launching an app, they may have limitations regarding custom logic and performance compared to fully-fledged native apps.
AI Assistance and Automation
Emerging tools are using AI to accelerate development further. Some app builders now incorporate AI assistants to help bootstrap apps or generate code. AI can aid by creating UI components from textual prompts (e.g., “Create a login screen”), writing boilerplate code, or suggesting database schemas. It can also automate testing (AI bots can simulate user actions) and provide analytics insights. In addition, services like OpenAI’s GPT or Google’s Bard can assist with brainstorming feature ideas or even writing snippets of code for complex logic.
Moreover, beyond building apps more quickly, AI features can be integrated into the app itself. This includes using image recognition APIs (to analyze photos taken by users), natural language processing (to understand user input), and translation services.
In summary, AI and no-code technologies are not magical solutions but powerful tools that can significantly speed up the app development process. They allow even those without coding experience to create functional applications in weeks instead of months.
AI helps save time on design and development, but it cannot create an entire custom application from a short input. Instead, combine the strengths of AI and no-code tools: use AI to automate repetitive tasks such as UI design and data handling, and use no-code platforms to assemble and deploy your application. This way, you can focus on more strategic aspects of your project, such as testing and planning.
How to Test Your App
Thorough testing is essential before launching. Plan for various types of testing on different devices:
- Device and OS Testing. If applicable, test on actual smartphones and tablets (not just using emulators) for both Android and iOS. Ensure that your app runs smoothly on different screen sizes and operating system versions. Use an ad-hoc or test flight build (iOS) and a closed beta (Android) to install a version similar to the final release on devices. This will help identify issues that may not have been caught during development.
- Beta Testing with Users. Recruit some potential users or friends to test the app and provide feedback. They can offer a “fresh perspective” and help you identify usability problems you might have missed. After testing, offer a simple survey or conduct a direct interview to learn about confusing features or missing functionality.
- Functional Testing. Verify that every feature functions as intended. Test all user journeys: logging in, entering data, navigating, making payments, etc. Ensure that edge cases are covered (e.g., empty fields, invalid inputs). Test the overall speed of the system, ensuring that there are no crashes when performing any action and that all features respond correctly.
- Performance Testing. Measure the time it takes for the app to start up, the speed at which the screen loads, and the amount of memory it uses. Ensure that animations are smooth and the app handles slow internet connections gracefully (by displaying loading indicators, for example). If the app relies on many images or data, consider optimizing it for faster loading times.
- Usability Testing. Observe testers as they interact with the app. Is the layout intuitive and easy to understand? Do users know what to do on each screen? Ensure that navigation is clear and logical, and that the design is consistent across all devices. If there are any confusing elements, consider redesigning them.
- Compatibility Testing. Install your app on a variety of device models and operating systems. For Android devices, test it on high-end and low-end models, as well as different Android versions (specifically 10-15). For iOS devices, test on older iPhones and iPads you plan to support.
- Security and Compliance Testing. If your app handles sensitive information or financial transactions, it’s important to test the security of your system. This includes ensuring that users can log in securely and that data is encrypted. You should also ensure that your privacy policies are clear and that users know how their data will be used. Apple and Google impose these requirements, so it’s essential to ensure that they are met.
- Automated Testing (if possible). For more complex applications, it is recommended to write automated tests for critical functions using frameworks such as Selenium, Appium, or XCTest. This is a common practice in professional development. No-code builders may provide built-in testing features. Always test your app on real devices before publishing it.
By the end of testing, you should have fixed all crashes and significant issues and polished the user experience. Only then proceed to publish
How to Publish Your App
Once your app has been thoroughly tested, you can submit it to the app stores. Each store has a different submission process.:
- Developer Accounts. Create developer accounts on the platforms on which your app is available. Apple requires enrollment in the Apple Developer Program (annual fee of $99). Google requires a Google Play Developer account (one-time fee of $25). You must create an account for each brand or business that owns the app.
- Prepare Store Listing. Before submitting, please gather all the required assets and information:
- App Name and Description: Write a clear and concise name and description that includes relevant keywords. Highlight the value of your app to help with App Store optimization.
- Keywords/Tags: (Apple only) Choose keywords for which users will likely search.
- Icon and Screenshots: Design an attractive app icon and create high-quality screenshots or videos that showcase your app’s key features. Apple also allows you to add a short promotional video. Optimizing metadata (app name, description, and keywords) for search will help users find your app.
- Categories: Choose the most appropriate category (for example, “Business” or “Games”) so that the app can be displayed in relevant lists.
- Privacy Policy and Contact Info: Provide links to your privacy policy (if applicable) and a contact email address.
- Submit to Apple App Store. Use Xcode or Application Loader to upload your final .ipa file to the App Store Connect website. Fill in the required app details and provide screenshots. Apple’s team will review your app according to App Store Review Guidelines. This process can take a few days or a week. If your app is rejected, they will explain the reason (often related to guideline issues or crashes), and you can make the necessary changes and resubmit your app for review.
- Submit to Google Play. To publish an app on the Google Play Store, you must create a developer account and link it to a Google Wallet Merchant account. Once done, you can use the Play Console to create your app and set up a store listing. Then, you’ll upload your Android app bundle (AAB), apply for content ratings, determine pricing and distribution options, and publish your app.
- Other Platforms (optional). If applicable, consider different options: Amazon Appstore (for Kindle and tablets), Samsung Galaxy Store, or Huawei AppGallery, available in Chinese markets. These platforms often have separate application submission processes. For a progressive web app (PWA), you need to publish it on a web server, and users can then install it from a browser (or by adding it to their home screen).
- Release and Monitor. After approval, your app will go live. Please share the download links on your website and social media channels. Monitor the first-day downloads and any crash reports carefully. Both stores offer analytics dashboards that allow you to track installs, ratings, and reviews. If any urgent issues arise (for example, if a critical bug appears), please address them promptly.
Publishing can be challenging, but many no-code platforms like AppsGeyser provide guidance and hands-on support for submissions. Remember to localize your listings by translating keywords and descriptions if you’re targeting multiple countries.
Post-Launch Tips and Best Practices
Launching your app is only the beginning. To continue growing and retaining users, consider implementing the following best practices:
- Collect and Act on Feedback. Provide a straightforward and easy way for early users to rate and review your app in the store. Monitor reviews and in-app feedback regularly to understand what users like and dislike about your app. Use this information to identify areas for improvement and update your app accordingly. Regular updates (at least every few weeks) will show users that you are actively working to improve the app and keep them engaged.
- Use Analytics. Integrate an analytics platform like Firebase or Flurry to track user activity and behavior. This will help you understand which screens users spend the most time on, where they drop off, and how long their sessions last. Some key metrics to monitor include daily and weekly active users, retention, and churn rates.
A/B testing can be used to test different features and onboarding screens to see which ones lead to higher engagement. You can optimize your product and improve user experience by testing these variations.
- Optimize Your Store Listing (ASO). App Store Optimization (ASO) is like SEO (Search Engine Optimization) for app stores. It involves using relevant keywords in the title and description of your app, updating screenshots when features change, localizing your app for different regions, and using high-quality icons. A catchy app name and quality content can also help boost click-through rates and downloads.
- Marketing and User Acquisition. Share the app on your social media platforms, your website, or through email newsletters. If it’s a significant app, consider sending out a press release. Use content marketing such as blog posts about the app’s features and benefits and paid advertising if your budget allows. Referral programs that reward users for inviting friends can also help with growth.
- Engage Users with Notifications. Use push notifications and in-app messages wisely to re-engage your users. Send reminders, updates, and personalized offers to keep your app at the top of their minds. However, avoid sending too many irrelevant notifications (which can lead users to disable them or uninstall your app).
- Maintain and Update. Monitor app performance and analyze crash logs (using Google Play Console and the App Store’s crash reporting tools). Fix bugs and compatibility issues as soon as possible (by adapting to new Android and iOS versions). Add new features according to user demand to keep the app relevant and fresh.
- Monetization Strategy. Consider different methods such as ads, in-app purchases, or a subscription model to monetize your app. Many apps use in-app advertising, including banner, interstitial, and rewarded video ads. Given the large advertising market (projected to reach over $530 billion by 2029), this could be a lucrative option, especially for free apps.
Alternatively, you could offer premium features behind a paywall or charge a small fee for the app. However, it’s essential to consider user experience. Too aggressive monetization could hurt retention, so finding a balance that works for both users and the business is essential.
- Stay Legal and Secure. If you handle personal user data, ensure that you comply with data protection regulations such as the GDPR and CCPA. Use HTTPS and secure storage to keep user data secure. If your app uses third-party software development kits (SDKs) or application programming interfaces (APIs), keep them up-to-date.
You can build trust and value with users by continuously improving your app after its launch. Many apps fail shortly after their release due to lack of attention; in contrast, apps willing to listen and adapt have the potential to thrive and even grow through word-of-mouth recommendations.
Common Questions About Making an App (FAQ)
How can I create my own app?
Anyone can create an app these days. You don’t need to be a programmer to do so. No-code app builders like AppsGeyser allow non-developers to build apps. These platforms take care of the backend and publication steps. If you are familiar with programming, you can use native or cross-platform frameworks like Android Studio, Xcode, or Flutter. In either case, begin by defining your app’s purpose, then use a builder or write your own code. The process typically involves designing screens, implementing logic (or configuring), and testing and publishing your app.Can I make an app for free?
Yes, there are several ways to create an app for free. No-code builders such as AppsGeyser offer a completely free plan. Appsgeyser Android app maker is free, and you can monetize it through ads. The basic functionality is free, but premium subscription plans provide additional features and benefits. Other platforms like Glide and AppSheet also have free tiers or trial periods. However, it’s important to note that publishing your app on app stores is not entirely free. Apple charges $99 per year for a developer account, and Google charges a one-time fee of $25. So, while the development process may be free, a small cost is still associated with launching your app.
How much does it cost to build an app?
The cost of developing an app varies widely, depending on several factors. If you choose a do-it-yourself (DIY) approach with a no-code builder, the cost can range from $0 to $50 per month, depending on the plan. Some plans require subscriptions for publishing. A simple app built by a freelancer or small agency can cost between $5,000 and $20,000. More complex apps, such as social networks, games, or enterprise applications, built by professional teams can cost anywhere from $50,000 to over $250,000. The cost depends on the features, design complexity, platforms, and the team building it. No-code builders offer the cheapest option, while custom agencies provide the most expensive solution.
Do app owners earn money?
Yes, many app developers earn revenue from their apps, but the success of each app varies. Some popular apps can generate significant income. For example, in 2025, users will spend approximately $150 billion on mobile apps, including in-app purchases, subscriptions, and paid apps. This represents a significant milestone for the mobile app economy. Globally, in-app purchase revenue is projected to reach $40 billion in Q1 2025 across iOS and Google Play, showing year-over-year growth of 11.1%. Standard app monetization methods include in-app advertising, in-app purchases, subscriptions (monthly or annual fees), and app download charges. Ad revenue and in-app purchases/subscriptions have driven the mobile market, but it’s important to note that most apps don’t generate much revenue unless they reach a large user base.. Careful planning of monetization, without ruining the user experience, is crucial.
How do I build an app from scratch?
Building an app “from scratch” means starting with no pre-existing template or code base. The process involves several steps:
- Plan your app: Define the idea, target audience, and main features.
- Choose your approach: You can code the app, learn Swift or Java, or use a no-code platform to generate the app.
- Design and prototype: Create mock-ups or wireframes for each screen.
- Develop: Implement the screens and features based on your chosen approach.
- Test: Thoroughly test the app on different devices.
- Publish: Submit your app to app stores (either through coding or the no-code platform).
Coding can take months to complete. However, using a no-code solution, you can create an app within days or weeks, depending on the complexity of your project. The key to success is following the above steps: plan, design, develop, test, and publish.
Each of these answers provides a starting point. As you delve deeper into the programming, design, and business aspects of app development, you will gain a better understanding of the various aspects involved. However, the main takeaway is that it is possible to create an app—even for free—by utilizing the right tools and processes.